The GTA building inspection checklist for property managers.
A twice-a-year inspection rhythm catches sealant failure, drainage issues, and facade defects before they show up as capital-plan emergencies — here's the practical checklist.
Quick answer
GTA property managers should inspect their building's exterior envelope and interior common areas twice annually — spring to assess winter damage, fall to prepare for the next season. The checklist covers facade sealants, roof drainage, window joints, exterior walls, lobbies, stairwells, life-safety equipment, and accessibility features. Findings go into a photo-documented, prioritized fix list that feeds directly into capital planning.
Why a twice-a-year rhythm works
GTA buildings live through two distinct stress events every year: winter and the transition back from it. The spring inspection — typically April or early May — assesses damage from freeze-thaw cycles, salt, ice loads on drainage systems, and UV degradation compounded by temperature swings. You're looking at what the winter broke. The fall inspection — September or October — prepares the building for the next cycle. You're sealing anything that could admit water before it has a chance to freeze in the joint.
Running only one inspection a year means either starting the winter with undetected vulnerabilities or emerging from it without a damage assessment until the following fall. Both gaps are expensive. Water that enters through a failed sealant in November and freezes in January expands the gap significantly by the time you catch it in May. A twice-a-year rhythm catches the damage while it's still a small repair rather than a capital item.
The spring-fall structure also aligns with typical capital planning cycles. Board-level budget discussions often happen in September and October for the following year. A fall inspection that identifies and prioritizes issues feeds directly into that process — rather than discovering a significant repair need after the budget is already set.
Exterior envelope: sealants, drainage, windows, facade, roof
The exterior envelope is where most preventable damage originates. Start with sealants: window perimeters, control joints, door frames, through-wall penetrations. Look for visible cracking, gapping, chalking (a powdery surface residue indicating UV degradation), or shrinkage that has opened a gap between the sealant bead and the substrate. Any of these is an admission point for water. Failed sealants are one of the leading causes of interior water damage on GTA high-rises and mid-rises, and they're inexpensive to address before they fail completely. See Caulking and Sealants for scope and scheduling.
Drainage is the next priority. Roof drains, scuppers, and any drainage paths on the podium or at grade should be clear and functional. In Toronto, a blocked drain combined with a spring melt event can deliver significant water loading to the roof membrane in hours. Check that drainage paths are clear of debris, that scuppers are unobstructed, and that water isn't pooling anywhere on accessible roof areas.
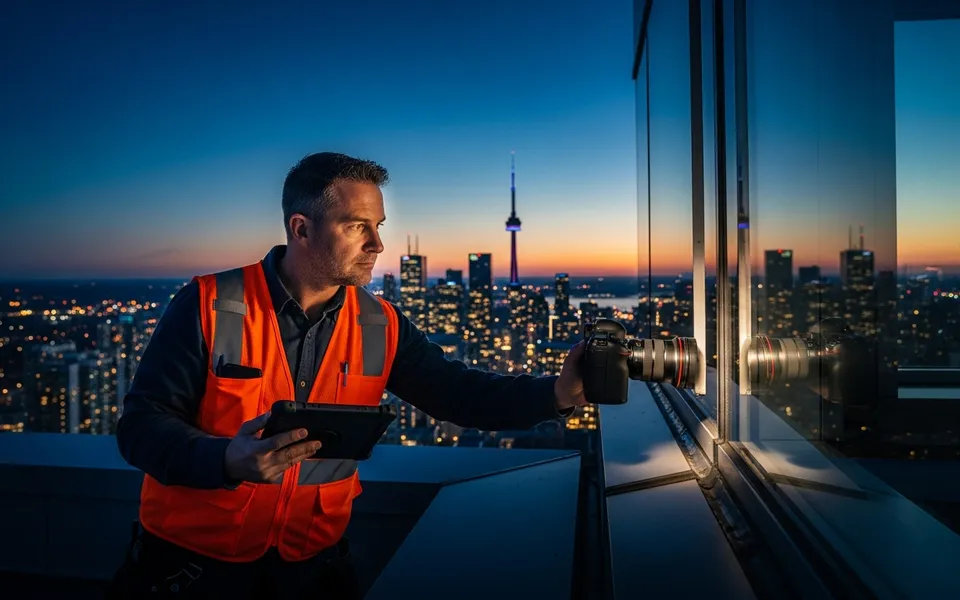
Walk the exterior walls for visible cracks, spalling concrete, displaced brick, or staining that indicates water migration. Staining on concrete — particularly rust-coloured streaking from rebar corrosion or white efflorescence from mineral deposits — tells you water has been entering the assembly. It's diagnostic: where you see staining, there's an admission point above it. Document everything photographically so comparisons are possible between inspection cycles. The Exterior Inspections program is built around exactly this documentation rhythm.
Interior common areas: lobbies, hallways, stairwells, mechanical rooms
Interior common-area inspections are less technical than exterior work but no less important for budgeting and board reporting. Start at the lobby: floor surfaces (particularly near the entrance, where GTA winter salt and grit cause accelerated wear), wall finishes, lighting, and the condition of any interior glass or feature walls. Lobby condition is often what ownership notices first — and deferred maintenance here erodes perceived building value quickly.
Hallways and corridors should be walked floor by floor, or at minimum sampled across representative floors. Look at wall paint condition (scuffing, impact marks, fading), carpet or resilient flooring wear patterns, door hardware and closer function, and any evidence of water infiltration from exterior wall assemblies — interior staining below window lines is a common symptom of failed perimeter sealants.
Stairwells are often overlooked until there's a specific complaint. Check handrail integrity, paint condition, lighting levels (particularly important for egress compliance), and any evidence of water intrusion through roof penetrations or wall cracks. Mechanical rooms should be assessed for leaks, corrosion, and any water staining on walls or floors that might indicate active infiltration or equipment drainage issues.
Life-safety and accessibility
Life-safety systems have their own mandatory inspection schedules under Ontario's fire code and building code, but the property manager's twice-yearly walk-through should include a visual pass on the life-safety elements visible during a common-area inspection. Check that exit signage is illuminated and unobstructed, that emergency lighting is operational (test buttons are accessible on most units), that fire extinguisher tags are current, and that stairwell doors close and latch properly. None of this replaces code-mandated inspections, but catching a dead emergency light or an obstructed exit sign between mandated cycles prevents the finding from lingering.
Accessibility features deserve the same attention. Automatic door openers at accessible entrances — lobby doors, accessible-unit corridors — should be tested for response and force calibration. Accessible washroom grab bars, ramps, and tactile flooring elements should be checked for damage or displacement. Ontario's Accessibility for Ontarians with Disabilities Act (AODA) compliance is increasingly part of insurance and regulatory review; an accessibility deficiency found during a third-party review is more expensive to address than one caught during your own walk.
Documenting findings: photo-verified, prioritized, capital-plan ready
An inspection is only useful if it produces a document you can act on. The minimum useful output is a written list of findings with photographs for each item, a prioritization tier (address immediately / address this maintenance cycle / monitor), and a rough cost category where possible (minor repair / major repair / capital replacement). That format drops into a board package without reformatting and gives your reserve fund consultant something to reference in their next study update.
The prioritization step is where experience matters. A hairline crack in a sealant bead might be a cosmetic issue at month one or the start of a failure sequence that will admit water within six months — the difference depends on the sealant age, substrate movement, and what the joint is protecting. A staining pattern on an interior wall might indicate a current active leak or a historic one that was already addressed. Knowing the difference requires someone who has seen enough buildings to recognize the pattern.
If you don't have a robust inspection process in place, the Free Building Health Report is the practical starting point. A trained Master Building Services technician walks your property — exterior envelope and interior common areas — and delivers the output in the format described above. It establishes a documented baseline condition and gives you a prioritized list to work from, whether you hire Master for the remediation work or not.
Free Building Health Report: the recommended starting point
For property managers who haven't run a structured inspection cycle before, or who are taking over a building without documented condition history, the Free Building Health Report provides a photo-documented exterior and interior walk-through with a prioritized fix list — at no cost and with no obligation to contract any remediation work.
The report is designed to serve two purposes simultaneously: give you a usable condition document, and demonstrate how Master Building Services approaches a building. The inspection is performed by a trained technician, not a sales representative. Findings are reported accurately regardless of whether the work falls in Master's service scope. The output is formatted for board presentation.
Once you have a baseline condition report, the twice-yearly inspection rhythm maintains it. Spring and fall walk-throughs compare current conditions to the baseline, track repair effectiveness, and catch new issues before they escalate. Contact us at masterbuildingservices.ca/contact to schedule your free Building Health Report.
Frequently asked questions
How often should a GTA building be formally inspected?
Twice a year is the practical standard for GTA climate conditions — spring (April–May) to assess winter damage, and fall (September–October) to prepare for the next freeze-thaw cycle. Buildings with known envelope vulnerabilities, active sealant failures, or a history of water infiltration may benefit from an additional mid-summer check. Mandatory code inspections (fire, elevator, HVAC) run on their own schedules and don't replace the property manager's condition walk-through.
What's the difference between a property manager's inspection and a reserve fund study?
A property manager's inspection is a condition walk-through that generates a current-state finding list and a near-term remediation priority list. A reserve fund study is a longer-horizon financial document — typically 30 years — that projects the remaining useful life of major building components and recommends annual contributions to the reserve fund. The two documents are complementary: current inspection findings can update the reserve fund study's assumptions, and the reserve fund study's component schedules inform which items are priority in the current inspection cycle. The Free Building Health Report produces an inspection-level output.
Can the inspection findings be used to challenge a vendor's workmanship?
Yes, if the inspection is photo-documented and timestamped. A before/after photo comparison showing that a condition worsened after a vendor's service visit establishes a baseline for a workmanship discussion. This is one of the practical reasons photo-verified completion reports matter: when you have a dated photo of condition before service and a dated photo after service, the comparison is unambiguous. Without that documentation, workmanship disputes become word-against-word arguments.
What should I do with inspection findings the building can't address this budget cycle?
Findings that can't be addressed immediately should be prioritized into two buckets: monitor (condition is stable and not a near-term risk) and defer with a defined timeline (condition is deteriorating but not yet urgent — schedule for next budget cycle). Both categories should be documented with photos so the baseline is clear. Deferred findings that don't make it into the budget should still appear in board reporting — a documented known condition is different from an undiscovered problem from a liability standpoint.
Start with a free Building Health Report.
Tell us about your building. We'll book the walk-through and deliver the report within 48 hours of the visit.
Serving Toronto, Mississauga, Brampton, Vaughan, Markham, Richmond Hill and the entire GTA.